1. The leaves of Corydalis Africana have several rounds, generally counting from the center to the outside. The leaves of the third to fifth rounds are most suitable for leaf insertion. Leave a 4cm petiole, and use the blade to cut the leaves obliquely.

2. Put the cut leaves into the sealing bag, and add water to the bottom of the petiole. Do not touch the leaves with water. The sealing bag cannot be sealed, and hang it on the clothes rack to wait for rooting.

3. Take a look every day. There is no water in the water, until the leaves take root, take them out and transfer them to soil culture. Note that the leaves face up, plant them at a 45 ° angle, pour them into water and maintain them with astigmatism.

4. Vermiculite, perlite and saprophytic soil can be used as the planting soil. Usually, the soil surface is white and watered. In less than 2 months, corydalis Africana can produce small buds.

5. When the seedlings grow to more than 5 leaves, they are transplanted into larger flowerpots, and then they change into larger ones as the plants grow up. It only takes 5 months for African pansy to grow and bloom.
1. There are many long-lived leaves. We need to pick the leaves with obvious bud points. If there are more tissues on the stem at the petiole when breaking off the leaves, the sprouting rate will be higher.

2. Leave the leaves on the window sill for 2 hours to dry. When preparing the basin soil, water it in advance, insert the leaves upward into the soil, and then move them back to the place where the sun can't shine.

3. In addition to sun protection, we should pay attention to ventilation. Every day, we should check the dry humidity of the basin soil. If the soil surface is dry and white, we can use the method of soaking basin to water it.

4. Wait like this. In about 10 days, white roots will grow at the petioles of Florist Kalanchoe. In another 20 days, small buds will appear on the leaves. There will be one or more small buds.

5. Grow the buds a little bit, transplant them into the flowerpot, and increase the light a little until they can receive the sunshine all day. When the seedlings grow to 4 pairs of leaves, they can make a top.

6. After topping, longevity can send out several lateral branches. When the lateral branches grow 4 pairs of leaves, topping again and repeating three times, longevity flower will be full of flowers and leaves.
1. Select a thick snake plant leaf, cut it into several sections with scissors, each section is more than 8cm long, do not let them see the sun, and let it hang for half a day.

2. Cut the leaves to dry, and insert them vertically into the clear water. Note that the leaves must not be inverted. Add water to the leaves 3-5cm before adding water, and change the clean water every two days.

3. It usually takes only 10 days for you to see a row of small white roots. After rooting, continue hydroponics, change water when the water is muddy, and wait for another 2 months or so, the leaves of snake plant will sprout small buds.

4. When the seedlings are more than 10cm long, they can be transferred from hydroponics to soil culture. When transplanting into the soil, they can break off the mother leaves, or they can be planted into the soil together with the mother leaves.

5. After transplanting, remember to water it with water, and still put it in the place of astigmatism and ventilation. After a week of slow basin, if the leaves of the seedlings are not soft, it means that the transplanting has survived!

1. Select the plump and fleshy ones, hold the leaves with your hands, and break them horizontally clockwise or anticlockwise. Break them in one direction, and do not shake them left and right, or it is easy to damage the growth point.

2. Prepare a take out box, make a small cut on the lid, put the fleshy leaves on it, and put half a box of clear water in the take out box to induce roots.

3. After the succulent leaves take root, prepare the soil with at least half of the particles. Spray some water to make the soil slightly damp. Place the succulent leaves face up on the soil surface, and cover the roots with less soil.

4. Before the fleshy leaves sprout, it is suggested that flowers should not be exposed to the sun. Put them in the astigmatism, spray water on the soil surface, and the fleshy leaves will sprout in about three weeks.

5. Fleshy sprouting means that the leaves survive, and then they need to be gradually polished, otherwise fleshy leaves tend to grow in vain. As for the mother leaves on the seedlings, don't pick them first, and wait for them to die.

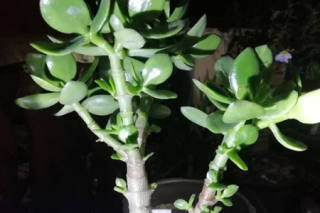
1. If you say that it is difficult to insert leaves, you must try Yushu. The vitality of this product is super tenacious. If you drop a leaf from the plant, you can take root and sprout by yourself.

2. The rooting leaves of Yushu can't fly all the time. You can put them in a small basin, let the petiole touch the soil, and make the root stick down. When the soil is dry, water it, and wait for it to germinate.

3. When the sprouts are grown up, you can divide them into pots, so that the eldest, the second and the third will not disturb each other's lives. After dividing the pots, remember not to sun them first and slow down the seedlings.

4. A week later, the young seedling's branches and leaves are still full and upright, so you can let it go out to see the light and the sun. When you water it, you can see the wet and dry. It's no problem for 20 years!
1. On the mother plant of geranium, select several healthy leaves without diseases and insect pests, cut several sponges, and insert the petiole into the half height of the sponge.

2. Put the sponge into the container, pour in a little water, so that the sponge can absorb water all the time, but it will not absorb a lot of water. Put it in the place of ventilation and astigmatism, it will take about 10 days to root.

3. After rooting, the leaves of Geranium are transplanted into the prepared culture soil. The soil is watered in advance, and the matrix can be mixed with peat soil and perlite.

4. This stage will continue to be put in the astigmatism, the soil will be dry and watery, and in another month, Geranium seedlings will grow at the petiole, and new life will be born.

5. When the young Geranium grows to two real leaves, it can be transplanted into the flowerpot. When transplanting, it is suggested to keep the mother leaves, gradually brighten up after a week, and then it can wait for flowering!
1. In the propagation of Epiphyllum, leaf cuttings are the most easy to take root and sprout, but it's best to choose the old leaves with strong growth and more than 2 years old, and put them on the cool windowsill for half a day.

2. For areas with high humidity, you can insert the leaves into the pine needles, pay attention not to insert them too deep, select transparent containers for convenient observation, and then keep the pine needles moist.

3. As long as the leaves are not rotten, the Epiphyllum will grow big white legs sooner or later. If the cutting leaves give out new leaves at this stage, it must be pinched out mercilessly so that it can concentrate nutrition on the hair roots.

4. After the Epiphyllum takes root, it can be transplanted into the basin soil. It is better to add pine needles and coarse sand to the humus soil. When watering, it will be wet and dry until a pole emerges from the soil.

5. Epiphyllum is afraid of exposure to the sun. Once the leaves are sunburned, it will cause irreversible damage. It's better to put them on dongyangtai for maintenance. It's well cultivated. It's said that cutting can blossom in the second year.

1. The leaves of the tree are relatively large. It is recommended to cut flowers with the method of breaking leaves. The knife should be wiped with alcohol to disinfect in advance to ensure that every broken leaf has veins.

2. Prepare sterile soil, use peat soil + perlite or pure perlite as the substrate, wet the soil, lay the broken leaves on the soil surface, and cover with fresh-keeping film for one week.

3. Open the fresh-keeping film 1-2 times a day for air exchange, keep it for a period of time, remove the fresh-keeping film one week later, and a lot of small potatoes will be produced at the vein of the leaf, and new leaves will appear.

4. It is most suitable for cutting with the method of broken leaves. When it is hot, cut the leaves casually, spread them on the soil surface for half a month, and then sprout a large area. After sprouting, continue the astigmatism maintenance.

5. In about one month, when the young seedlings of the big rock Tung grow up, they can be dug out and maintained in separate pots. In two to three months, the plants can be raised and bloomed in one flowerpot and one seedling.
1. In the middle and lower part of the Douban green potted plant, take off several large robust leaves, and put them on the windowsill where the sun can't reach to air them, so as to dry and shrink the wound.

2. Prepare the basin soil, pour it through with water in advance, insert the green leaves of bean petals into the soil obliquely upward, and then put them in the place of astigmatism and ventilation. When the soil is dry, spray water with a watering can.

3. About 3 weeks later, Douban green can take root. At this time, do not touch it, continue to put it in the astigmatism place for maintenance, and wait another half a month, and a new bud can be produced at the petiole.

4. During this period of time, observe the whiteness of the soil surface, pour water once to make the bean green see the sunshine, keep the mother leaves, and break them off when the seedlings grow to 10cm high.

5. Break off the green bean petal of the mother leaf, which is a plant growing independently. It is also quite shade resistant. It is enough to grow healthily when it is placed in the bright astigmatism at ordinary times.
1. On the mother plant of alum root, select the complete leaves with base. When picking, select the large and healthy leaves, and then gently break them from the bottom to the outside.

2. Prepare the pot soil. Fill half of the substrate in the pot first, then place the alum root and petiole vertically, then fill the other half of the soil, and use the watering can to water.

3. The potted plants can be placed in the tray. Always keep the tray full of water. Put them in the place with light and ventilation. About one month, the root and leaves of alum can take root.

4. After rooting, the root of alum should be maintained. Don't try to pull it out to have a look. That will only reduce the probability of its survival until a young seedling is drilled out of the soil.

5. When the young seedlings grow to 3-5 true leaves, they can take the soil lump and transplant one piece into the big flowerpot. After observing that the young seedlings have new leaves, it means that the root of alum is completely alive!